Create your first invoice
Set up your firm
Section titled “Set up your firm”- Sign in using the email address associated with your firm. If you received an invitation, open it and sign in with the address it was sent to.
- Check the active firm in the workspace switcher before adding records.
- If you’re a firm Admin, open Settings and fill in Firm billing identity. Use the name, billing address, reply email, and payment instructions clients should see. Set your invoice number prefix before issuing an invoice.
See firm setup and team roles.
Bill and invoice your first matter
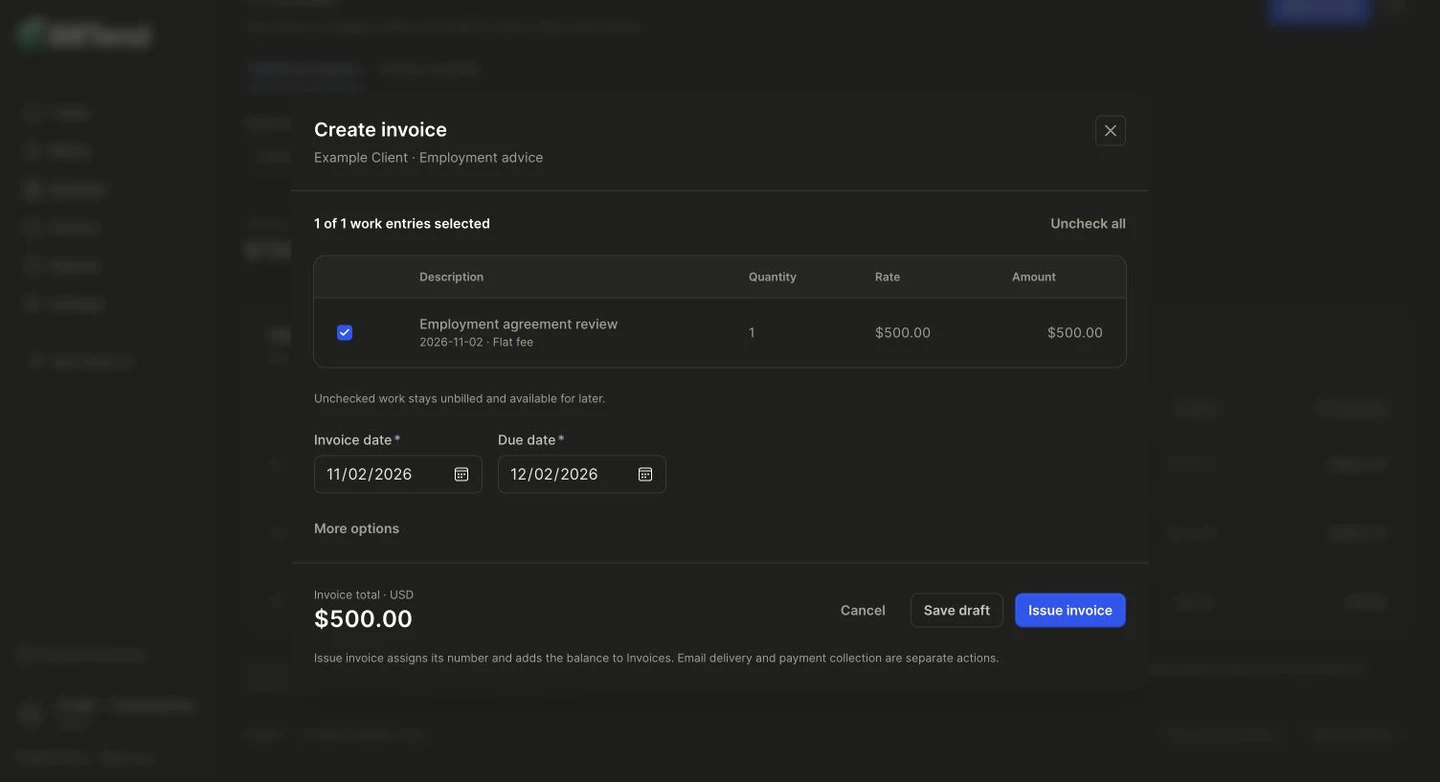
Section titled “Bill and invoice your first matter”- Select Create invoice from Home or Invoices. Choose an existing client and matter, or add them as you go. Use General billing for work that doesn’t belong to a matter.
- Review any saved work. Add a time entry, flat fee, or expense if needed. Select the charges to include.
- Verify the billing recipient, due date, and total. Select Save draft if the invoice needs another review or Issue invoice when it’s ready to issue.
- Open the invoice document to view or save the PDF. If invoice email is enabled, open Invoice email to review and approve delivery separately.
Use the sun or moon in the header to switch the app theme. Open Help in the sidebar for navigation shortcuts.
After receiving money, open the invoice and record the payment or verify it in the source system. Home reflects the recorded balance and activity.